

When it comes to restoring or enhancing the beauty of a classic car, selecting the right paint is a monumental decision that can significantly influence the vehicle’s overall aesthetic and value. The painting process not only protects the metal from corrosion and damage but also serves as a form of artistic expression, allowing owners to showcase their personality and preferences. However, the myriad of options available today can often be overwhelming, making it imperative to approach the selection process with careful consideration.
Firstly, it’s essential to understand the different types of paint on the market. Acrylic enamel, urethane, and base coat/clear coat systems each have distinct characteristics that can affect the final finish and durability. Acrylic enamel, for instance, provides a glossy finish but may not offer the same level of protection as urethane, which is known for its resilience and long-lasting sheen. Recognizing these differences allows owners to match their paint choice with their needs and the intended use of the car.
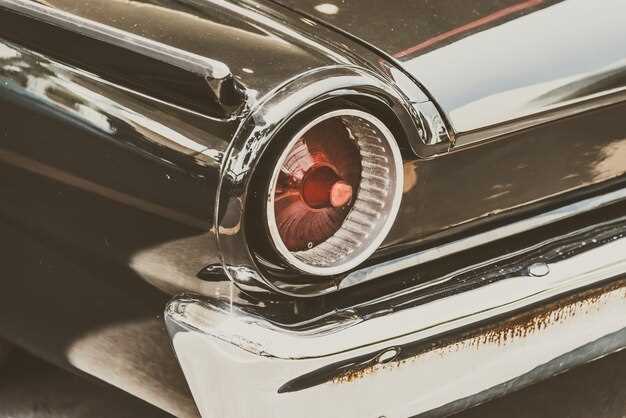
Moreover, color selection plays a pivotal role in the painting process. Classic cars often evoke nostalgia, and many owners may wish to maintain the original color or select a hue that reflects the era of the vehicle. Be it a deep cherry red or a stunning azure blue, each color tells a story and captures a part of automotive history. Testing color samples and understanding how different shades interact with lighting can help make an informed choice that enhances the car’s vintage allure.
Understanding Paint Types: Enamel vs. Acrylic vs. Urethane
When it comes to restoring or repainting classic cars, selecting the right type of paint is crucial for both aesthetics and longevity. Three popular paint types to consider are enamel, acrylic, and urethane. Each has its own characteristics, advantages, and disadvantages.
1. Enamel Paint
Enamel paint is known for its durability and hard finish. It has been a traditional choice for many classic car restorations.
- Composition: Made from a resin that hardens over time, providing a tough surface.
- Finish: Typically has a glossy appearance, which can enhance the car’s look.
- Drying Time: Dries slowly, allowing time for adjustments but requiring longer for complete curing.
- Pros:
- Good resistance to scratches and chemicals.
- Often less expensive than other options.
- Cons:
- Can yellow over time when exposed to UV light.
- More prone to chipping compared to modern paints.
2. Acrylic Paint
Acrylic paint is favored for its ease of application and vibrant color range, making it popular among custom enthusiasts.
- Composition: Water-based or solvent-based, with a resin that gives it flexibility and a smooth finish.
- Finish: Available in both glossy and matte finishes, with excellent color retention.
- Drying Time: Dries quickly, enabling faster project completion.
- Pros:
- Good pigment quality and a wide variety of colors.
- Less toxic than solvent-based paints.
- Cons:
- Less durability compared to urethane and enamel.
- May require a clear coat for extra protection.
3. Urethane Paint

Urethane paint is increasingly popular due to its exceptional durability and resistance to UV rays.
- Composition: Made from a mixture of polyurethane, known for its strong bond to surfaces.
- Finish: Provides a high-gloss finish that enhances the car’s appearance.
- Drying Time: Cures quickly, often within hours.
- Pros:
- Highly resistant to fading, chipping, and chemicals.
- Long-lasting protection, maintaining appearance over time.
- Cons:
- More expensive than enamel and acrylic paints.
- Requires proper safety measures during application due to volatile organic compounds (VOCs).
Choosing the right paint type depends on your specific needs, budget, and the intended use of your classic car. Enamel offers a traditional look, acrylic provides vibrant colors, and urethane delivers superior durability.
Preparing Your Classic Car’s Surface for Optimal Adhesion
Before applying paint to your classic car, it is essential to ensure that the surface is properly prepared. This process not only enhances the aesthetic appeal but also improves the longevity of the paint job. Start by thoroughly cleaning the surface to remove dirt, grease, and old wax residues. A mixture of soap and water can be effective for this step, but ensure that it does not leave any residue behind.
Once cleaned, inspect the surface for any rust spots or imperfections. Sand any rust areas down to bare metal using sandpaper or a wire brush. Afterward, feather-edge the surrounding paint to ensure a smooth transition between the bare metal and existing paint. This technique helps to achieve a seamless finish once the new paint is applied.
Next, it is crucial to sand the entire area that will be painted. Use finer sandpaper to create a smooth surface that promotes adhesion. This process helps to scuff up the existing paint, providing a better grip for the new layers of paint. Pay attention to corners and crevices, which may require more precise sanding techniques.
After sanding, clean the surface again with a degreaser or solvent. This removes fine dust and ensures that no contaminants affect the paint adhesion. For best results, use a lint-free cloth to wipe down the surface. Additionally, consider using a tack cloth to pick up any remaining dust particles.
Finally, it is recommended to apply a suitable primer on the prepared surface. Primer creates a barrier that improves adhesion and provides an even base for the topcoat. Choose a primer that is compatible with the paint type you intend to use. Allow the primer to dry according to the manufacturer’s instructions before proceeding to the painting stage.
Selecting the Right Color and Finish for Authentic Restoration
Choosing the appropriate color and finish for your classic car restoration is paramount for achieving authenticity. The first step is to research the original factory colors offered for your specific make and model during its production year. This information can often be found in historical documents, brochures, or dedicated car enthusiast forums.
Consider the color codes, which can give you precise information on the shades that were available. Each manufacturer had specific palettes, so restoring to an original hue enhances the vehicle’s historical value. Ensure that any color you choose reflects the correct year, as manufacturers often changed color offerings yearly.
With the original shades in mind, it’s essential to also think about the finish. Classic cars typically had finishes ranging from matte to high gloss. Each finish impacts the overall appearance and can evoke a certain era or design philosophy. For example, a high-gloss finish can highlight the car’s curves and lines, while a matte finish can give a more aggressive and modern look.
When selecting a finish, consider the type of paint used historically. Often, classic cars were painted with single-stage acrylic enamel or lacquer. These paints not only provide an authentic look but also offer ease of application and repair. If opting for modern paints, ensure they are compatible and designed to mimic the original finishes while adhering to contemporary standards and durability.
Finally, once you’ve settled on a color and finish, consider performing a test patch on a small, inconspicuous area of the car, or use a spray-out card. This will allow you to see how the color looks in different lighting conditions, ensuring it meets your expectations before the full application.