

Leather seats in classic cars are not only a hallmark of elegance but also require special care to maintain their beauty and integrity. Over time, exposure to sun, dirt, and moisture can lead to wear and tear, making it essential for car enthusiasts to adopt a consistent cleaning and conditioning routine. This article provides you with valuable tips to keep your classic car leather seats in pristine condition.
Proper cleaning is the first step in preserving the quality of leather upholstery. Before applying any cleaning products, it is crucial to determine the type of leather used in your vehicle. Some leathers require gentle cleansers, while others can withstand more intensive cleaning solutions. Regular maintenance, including dusting and vacuuming, will prevent dirt buildup and extend the life of your seats.
Once cleaned, conditioning is vital to keep the leather supple and prevent cracking. Using a high-quality conditioner specifically designed for leather helps to nourish the material and restore its natural oils. It is recommended to apply conditioner every three to six months, depending on climate conditions and usage. By following these tips, you can ensure that your classic car’s leather seats remain an attractive feature for years to come.
Choosing the Right Cleaning Products for Leather
Selecting the appropriate cleaning products for leather seats in classic cars is crucial to maintain their appearance and longevity. It is important to understand the different types of leather and their specific care requirements. Always opt for cleaners specifically designed for leather to ensure compatibility and prevent damage.
First and foremost, avoid using all-purpose cleaners, as they may contain harsh chemicals that can strip the leather of its natural oils, leading to cracks and dryness. Instead, choose pH-balanced leather cleaners that are gentle yet effective. Look for products that contain natural ingredients and are free from solvents and alcohol, which can be detrimental to the material.
When selecting a cleaner, consider whether your leather is finished or unfinished. Finished leather, which has a protective coating, can usually withstand a wider range of cleaners but still benefits from specialized formulations. Unfinished leather, on the other hand, is porous and requires products specifically designed to clean without saturating the material. Always check the label to confirm the product is safe for your type of leather.
Additionally, opt for cleaners that come in spray bottles with fine mist applicators, allowing for even distribution on the surface. This can help prevent pooling, which may cause staining or other damage. When cleaning, pair the product with a soft, lint-free cloth or microfiber towel to gently wipe away dirt without scratching the leather.
Finally, don’t forget to apply a quality leather conditioner after cleaning. Conditioners replenish lost oils and moisture, providing a protective barrier against future wear and tear. Always test any product on a small, inconspicuous area before full application to ensure there are no adverse reactions. By choosing the right cleaning products, you can keep your classic car’s leather seats looking pristine and well-maintained for years to come.
Step-by-Step Guide to Deep Cleaning Leather Seats

Deep cleaning leather seats requires a systematic approach to ensure that the material is properly maintained without causing damage. Follow these steps to achieve a clean and refreshed look for your classic car’s interior.
Step 1: Gather Supplies
Before you start, collect the following items: a vacuum cleaner with a soft brush attachment, gentle leather cleaner, microfiber cloths, a soft-bristled brush, and leather conditioner. You may also need a spray bottle and warm water.
Step 2: Remove Debris
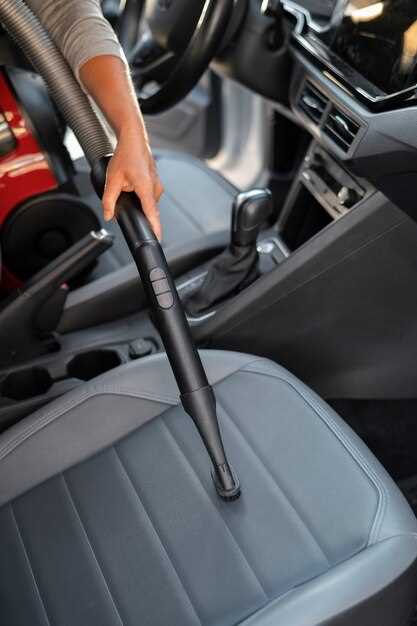
Begin by using the vacuum cleaner to remove loose dirt, crumbs, and debris from the seats. Pay special attention to seams and crevices, as dirt often accumulates in these areas.
Step 3: Prepare the Cleaner
Mix the leather cleaner with water according to the manufacturer’s instructions, if applicable. If you are using a spray bottle, ensure that it is properly labeled to avoid confusion.
Step 4: Test a Small Area
Before applying the cleaner to the entire seat, test it on a small, inconspicuous area. This will help you check for any adverse reactions with the leather. Wait a few minutes to observe any changes.
Step 5: Clean the Seats
Using a microfiber cloth or a soft-bristled brush, apply the leather cleaner in a circular motion. Avoid soaking the leather; instead, use just enough solution to effectively lift dirt and grime. Wipe away any excess cleaner with a fresh microfiber cloth.
Step 6: Address Stains
For stubborn stains, apply a small amount of cleaner directly to the affected area and gently scrub with the soft brush. Be cautious not to be overly aggressive to prevent damaging the leather surface.
Step 7: Dry the Seats
Allow the leather to air dry completely. Avoid using heat sources such as hair dryers, as they can cause the leather to crack. Instead, ensure good ventilation in your working area for natural drying.
Step 8: Apply Leather Conditioner
Once the seats are dry, apply a quality leather conditioner to maintain suppleness and prevent cracking. Use a clean microfiber cloth to apply the conditioner, working it into the leather in a circular motion. Allow it to absorb for the recommended time as stated on the product label.
Step 9: Buff the Surface
After the conditioner has set, use a dry microfiber cloth to buff the leather surface. This will enhance its shine and provide a smooth finish.
Step 10: Regular Maintenance
To keep your leather seats in optimal condition, regularly vacuum them and apply conditioner every few months. This proactive approach will prolong the life of your seats and maintain their aesthetic appeal.
Best Techniques for Conditioning and Protecting Leather
To ensure the longevity of your classic car leather seats, proper conditioning and protection are essential. Start by selecting a high-quality leather conditioner specifically designed for automotive use. This ensures compatibility with the materials used in car interiors.
Before applying any conditioner, thoroughly clean the leather with a gentle, pH-balanced cleaner to remove dirt, dust, and oils. Use a soft microfiber cloth or sponge to prevent scratches on the surface. Once cleaned, allow the leather to dry completely before proceeding with conditioning.
Apply the leather conditioner in small amounts to a clean cloth and work it into the leather using circular motions. Focus on areas that are prone to wear, such as bolsters and seams. This technique allows the conditioner to penetrate the leather fibers and rejuvenate the material effectively.
After conditioning, give the leather ample time to absorb the product. This usually takes about 20 to 30 minutes. Wipe off any excess conditioner with a clean, dry cloth to avoid a greasy finish. Regular conditioning, approximately every 3 to 6 months, helps maintain moisture and flexibility, preventing cracking and fading.
To protect your leather from UV damage and staining, consider using a leather protectant or sealant. These products create a barrier against moisture and harmful UV rays, keeping the leather looking fresh and vibrant. Apply the protectant following the manufacturer’s instructions for best results.
In addition to conditioning and protecting, it’s vital to maintain a consistent cleaning routine. Regular dusting and spot cleaning can prevent dirt buildup and prolong the life of your leather seats. Always use products that are safe for leather and avoid harsh chemicals that can damage the material.