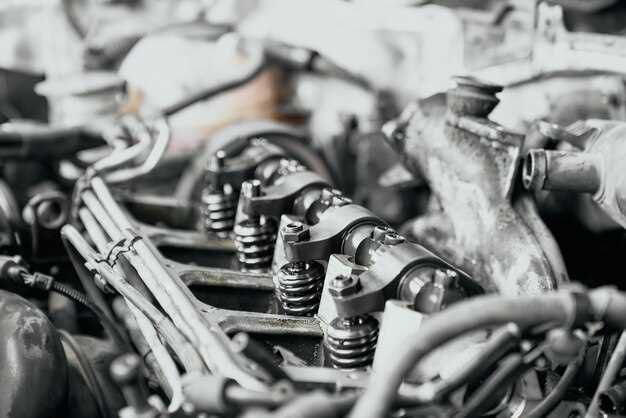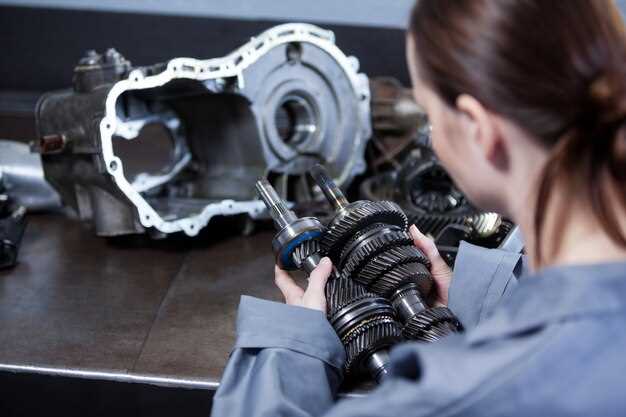
Restoring a classic car is more than just a labor of love; it’s an intricate process that involves a deep understanding of engineering and mechanics. One of the most crucial aspects of this restoration journey is rebuilding the engine. Crafting a powerful and reliable engine can transform an old vehicle into a true gem, breathing new life into its vintage chassis. This guide aims to provide a comprehensive, step-by-step approach to help enthusiasts undertake this rewarding project.
The process of rebuilding an engine requires a combination of skill, patience, and the right tools. Whether you are a seasoned mechanic or a first-time restorer, understanding the fundamentals of engine assembly is essential. In this guide, we’ll cover everything from selecting the appropriate tools and components to detailed instructions on disassembly, cleaning, machining, and reassembly.
Moreover, we will emphasize the importance of attention to detail and meticulous planning, ensuring that every step not only revitalizes the engine but also enhances its performance and longevity. By the end of this guide, you will be equipped with the knowledge and confidence to tackle your classic car engine rebuild, preserving the heritage of your vehicle while maximizing its potential on the road.
Assessment of Engine Condition Before Disassembly
Before embarking on the disassembly of a classic car engine, a thorough assessment of its condition is crucial. This evaluation provides insight into the engine’s overall health and helps in determining the extent of repairs needed. Begin by examining the engine for any visible damage such as cracks, rust, or leaks. Pay special attention to the oil and coolant passages, as signs of corrosion may indicate underlying issues.
Next, perform a compression test to evaluate the engine’s internal condition. This test measures the ability of each cylinder to hold pressure, revealing information about the piston rings, cylinder walls, and valves. Inconsistent readings among cylinders can signal significant problems that require immediate attention.
Check the oil quality and level. Old or contaminated oil can indicate neglect and may contribute to additional wear on internal components. If possible, collect an oil sample for analysis to uncover any signs of metal contamination, which suggests severe wear or failure of engine parts.
Inspect the ignition system, including spark plugs and wiring. Worn or fouled spark plugs can affect engine performance and fuel efficiency. Reviewing the electrical connections and sensor functionality will also help you identify potential electrical issues that might complicate the rebuild.
Additionally, listen to the engine while it is running, if applicable. Unusual noises, such as knocking or grinding, may point towards mechanical failure. Pay attention to the exhaust for excessive smoke, which could indicate oil burning or coolant leakage into the combustion chamber.
Finally, document your findings with notes and photographs. This comprehensive assessment will serve as a reference during the disassembly process and help prioritize repairs. Understanding the condition of the engine before you start dismantling it will streamline your rebuild efforts and ensure a successful restoration of your classic vehicle.
Key Tools and Parts Required for Engine Rebuild

Rebuilding a classic car engine requires specific tools and parts to ensure a successful and efficient process. Understanding what you need before starting is crucial to avoid delays and ensure quality work.
Essential Tools:
1. Socket Set: A comprehensive socket set with various sizes is necessary for removing and tightening bolts in the engine assembly. Look for a set that includes both standard and metric sizes.
2. Torque Wrench: This tool is vital for applying the correct torque to bolts and nuts, preventing over-tightening or under-tightening, which can lead to engine failure.
3. Engine Hoist: An engine hoist is crucial for safely lifting and maneuvering the engine in and out of the car, especially if you are working alone.
4. Bench Grinder: For resurfacing and smoothing parts, a bench grinder can be useful, particularly when working with metal components.
5. Compression Gauge: This tool measures compression pressure in the engine cylinders, which helps in diagnosing issues with the engine before and after the rebuild.
6. Dial Indicator: Used to measure small distances, a dial indicator is essential for checking the alignment of various engine parts, ensuring everything fits perfectly.
7. Cleaner and Degreaser: Prior to rebuilding, cleanliness is paramount. Use heavy-duty cleaners and degreasers to prepare engine parts for reassembly.
Essential Parts:
1. Piston Assembly: Ensure you have matching piston rings for your engine type, as they provide a tight seal in the combustion chamber.
2. Camshaft: The choice of camshaft can significantly affect performance. Select one that matches your desired engine characteristics.
3. Cylinder Head: A good-quality cylinder head, whether rebuilt or new, is critical to engine performance, affecting airflow and combustion efficiency.
4. Gaskets and Seals: New gaskets and seals are necessary to prevent leaks and ensure a proper seal between engine parts. Be sure to replace all old gaskets during the rebuild.
5. Timing Chain or Belt: Replacing the timing chain or belt is crucial if the original component shows signs of wear. This ensures proper synchronization between the crankshaft and camshaft.
6. Oil Pump: A new oil pump is recommended to ensure adequate lubrication throughout the engine, preventing wear and potential operation failure.
7. Water Pump: Replacing the water pump during the rebuild can prevent overheating issues in the future, maintaining optimal operating temperatures.
Having the right tools and parts on hand will not only streamline your engine rebuild process but also enhance the overall quality of the finished project. Make sure to source high-quality components and tools specifically designed for your classic engine for the best results.
Reassembly Tips to Ensure Optimal Engine Performance

Reassembling a classic car engine is a critical step that can significantly impact performance. Proper execution of this phase ensures longevity and efficiency. Below are essential tips to follow during reassembly:
-
Clean Components Thoroughly:
Ensure all parts are free from contaminants such as dust, dirt, and oil residues. Use appropriate cleaning solutions and avoid abrasive materials that could damage surfaces.
-
Organize Parts:
Keep all components organized and labelled. Use a parts tray to prevent misplacement and ensure you have everything needed for reassembly.
-
Inspect Components:
Before reassembly, inspect gaskets, seals, and other components for wear. Replace any worn or damaged parts to prevent leaks and ensure proper sealing.
-
Use Proper Torque Settings:
Consult the manufacturer’s specifications for torque values. Use a torque wrench to apply the correct tension to bolts and fasteners, minimizing the risk of stripping threads or damaging components.
-
Follow an Assembly Sequence:
Adhere to a specific assembly sequence. This ensures that all parts fit correctly and reduces the likelihood of missing components.
Consider the following sequence for key components:
- Install crankshaft and bearings.
- Assemble connecting rods and pistons.
- Attach the cylinder head with new gaskets.
- Install the timing chain/belt and ensure correct alignment.
- Secure intake and exhaust manifolds.
-
Lubricate Moving Parts:
Apply a thin layer of engine oil to all moving parts, particularly on bearings and ring surfaces. This minimizes wear during the initial startup.
-
Double-Check All Connections:
Ensure that all connections, including electrical and fuel lines, are secure before starting the engine. This prevents leaks and potential fires.
-
Test Before Full Assembly:
After major components are installed, perform a bench test if possible. Check for proper functioning of moving parts and address issues immediately.
Taking the time to carefully reassemble your engine will pay off in improved performance and reliability. Following these tips provides a solid foundation for a successful rebuild.
